An ongoing pandemic, supply chain disruptions, worker shortages and political unrest have laid bare the fragility of our societal foundations. Combine these current challenges with the constant threat of natural disasters and it’s easy to imagine how civilization can begin to unravel at the seams.
Are you ready for the next crisis? A basic, disaster preparedness kit is sufficient for most crisis events, and ready.gov recommends being prepared for a disaster situation that could last three days.
There is no one-size-fits-all preparedness plan since needs will vary based on the environment and other personal factors. The need for food and water, however, is universal. When the tap runs dry, your emergency supplies dwindle, and trucks stop showing up to grocery stores, what should you do?
Locating, collecting, assessing, and treating water
In A Field Guide to Clean Drinking Water: How to Find, Assess, Treat, and Store It, renowned survivalist Joe Vogel shares his expertise in this particular survival skill. I’ve used it as the foundation for this portion of this explainer.
Oklahoma has numerous field sources for water: rivers, lakes, ponds, swimming pools, drainage ditches, and more, but if there are no known water sources around, here are some strategies for seeking out hidden water.
First, mind property lines. If you’re searching on someone else’s property without contacting the owner in advance, you’ll have bigger problems on your hands.
Next, study the terrain in the area. Look for low-lying topographical features and imagine where water would flow and collect during rainfall.
Pay attention to the nearby plants and wildlife. Certain types of vegetation signal the presence of standing water or consistently moist soil. Plants common to wet areas in Oklahoma include reeds and rushes (tall, stiff grass-like plants that grow in clumps), cattails, ferns, and trees with shallow root systems, like the willow.
The appearance of snails, slugs or gatherings of vertebrate animals is also a sign of nearby water. Keep in mind that animals are carriers of disease, so treatment of raw water is imperative. More on that later.
In the absence of flowing or standing water sources, you might have to earn a drink with sweat equity. Once you’ve located an appropriate low-lying area, ideally with promising signs of vegetation, attempt to dig at least three feet deep and wait for water to collect in the bottom of the hole.
If you have the luxury of waiting for rain, collecting rainwater for drinking is easy and safe. If it hasn’t come in contact with the ground or any other potentially polluted surface, rainwater can generally be consumed without treatment. Puddles or ponds must be treated.
If digging and waiting for rain are not options, capturing water from the air may be the best bet in desperate situations. Use a tarp, rescue blanket, or other sail-like structure hung vertically to gather condensation overnight. Form a small trough or fold at the bottom of the sheet to collect the water as it trickles down the surface and wring out any excess water before the sun rises and evaporates it, according to Vogel.
Use your senses to help you determine the quality of raw water. Safe drinking water should have no odor or strong flavor. Is the water standing or flowing? Flowing water tends to have fewer germs but could still be contaminated with chemicals.
The appearance tells you much. If it’s clear or slightly-discolored the water probably contains tannins from organic matter and is likely not contaminated with heavy metals or other harmful chemicals. Any haziness is a sign that there is sediment or microorganisms that need to be filtered out before purification. If the color of the water is very dark, bright yellow, green, or blue, it is polluted and unsuitable for consumption, Vogel writes.
The purpose of treating raw water is not to sterilize it but just to reduce the amounts of pathogens and pollutants to safe levels. This is the same standard of tap water. It’s not sterile but “safe enough” to drink.
The largest bits of debris and silt must be removed by way of sedimentation. Leave raw water to sit, allowing the sediment to settle at the bottom or float to the top, depending on the properties of the various materials. After the solids have completely separated to the very top and bottom of the container, perform decantation. Begin by slowly and carefully pouring the buoyant top layer away, then slowly and carefully pour the clear, mid-layer of water into another container for further treatment.
Be sure not to return the container to the upright position before the pouring process is complete or it will have to be repeated.
Some particles in raw water may need to be removed through precipitation using heat. Raw water that is high in minerals, metals, algae, etc. needs to be treated with heat. Do not boil the water, which will destroy the cells of microorganisms and release toxins into the water. Allow the water to cool, then pour it off in the same process described above.
After sedimentation and decantation, the raw water should be further purified through tightly-packed woven fabric, plant fibers (like cattail hairs), sponges, or whatever else you have that might work. The neck of a plastic bottle that is stuffed and layered with fabric or fibers works well for prefiltration.
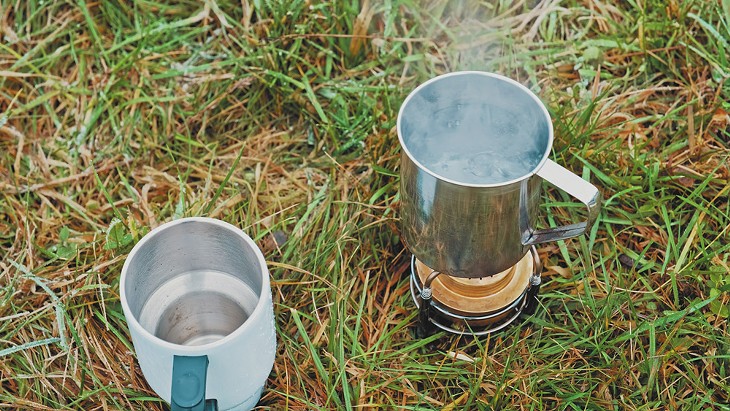
For water disinfection, boiling water to disinfect is the simplest method, but takes a lot of energy. According to Vogel, heating water to 180 degrees Fahrenheit or just up to the boiling point is sufficient to kill organisms of concern.
SODIS (solar water disinfection) is done with a clear plastic bottle, clear glass, or clear hydration bladder. It’s effective only in transparent containers and with water that has no cloudiness since ultraviolet rays must penetrate thoroughly. On a clear, sunny day, apply the SODIS method for six to ten hours. Cloud cover will diminish its effectiveness and it can take up to two or three days.
If you’ve planned ahead, the easiest method of disinfection by filtration is a backpacking water filter. If you have to make a filter, charcoal is a decent filtration medium for germ reduction, though not as effective. If you’ve thought ahead and have disinfection drops or tablets, be sure to follow the directions precisely or they could be at best ineffective or at worst, harmful.
Once you’ve done all the work to collect and treat this hard-earned resource, you’ll want to do everything you can to prevent recontamination in storage. Germ growth can pose problems if drinking water is not properly preserved and stored long-term.
Improvised containers may be necessary if nothing else is available. A plastic bag or condom inside a cloth cover, like a pant leg tied off at the bottom, would make a good transport container. “When using thin material such as latex or plastic sheeting to fashion a transportable container, adding a stabilizing outer shell is essential,” Vogel writes. Place the plastic bag or condom inside the cloth shell before filling it with water to avoid puncturing it after it’s filled.
If you’re improvising stationary storage, a small hand-dug pond lined with a rescue blanket or other non-porous sheet will work. Fashion a cover for the pond to slow evaporation and recontamination.
For preserving clean drinking water, repeat SODIS or utilizing a process called tyndallization (a fancy way to say “repeated boiling”) are your best bets.
“Water that has been heated to boiling point can be consumed immediately after cooling but will recontaminate quickly…Reheating it briefly during the following two or three days, however, reduces the number of inactive and heat-resistant [phages] to vanishingly low levels,” Vogel writes.
Repeated SODIS is done by storing drinking water directly in the sun in clear food-grade containers so that ultraviolet radiation penetrates and kills germs daily. This is best done on intensely sunny days.
In contrast, you can store disinfected water in a cool, shady place to stifle the growth of algae and bacteria. The “chill and shade” storage method keeps water safe for drinking for a few days.
Wild food for wild times: an introduction to safe and ethical foraging practices
In times of stability, foraging (also known as wildcrafting) is a great way to enjoy time outdoors and be more connected to nature. If produce supply chains are interrupted or social unrest leads to the closure of grocery stores, knowing where to find edible and medicinal wild plants and fungi is an important survival skill.
Foraging fosters independence from industrialized food production systems and can help control the spread of invasive species.
With some education and practice, anyone can learn how to find local wild food, and finding a community of experts to learn from is vital.
Ashley Clouse is a homesteader with her husband, Stewart, and their 10 children at Restoration Farms in Peggs, about 60 miles east of Tulsa. She and Stewart offer classes on homesteading techniques, water filtration, off-grid cooking and other topics in self-sufficiency.
What follows is a summary of Ashley Clouse’s introduction to wildcrafting workshop.
It takes time and practice to become proficient at foraging, but to get started, here are important elements to focus on: plant/fungi identification, consideration of contamination risks, and ethical practices.
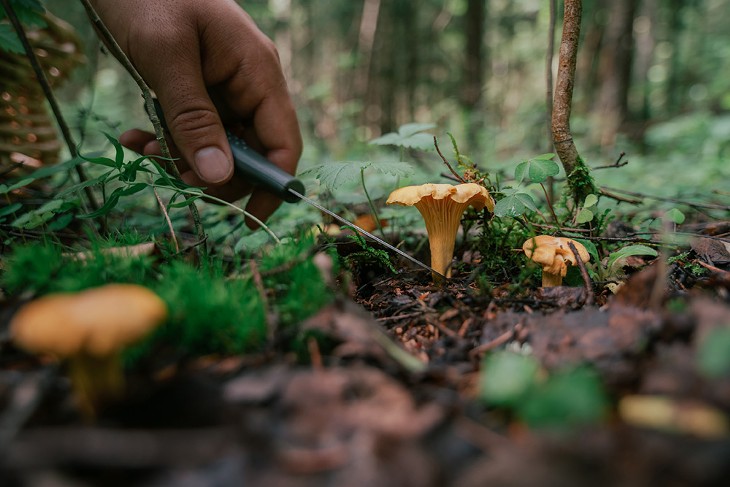
The most important factor in successful foraging practices is proper identification. Accurate identification is a matter of life and death. If you’re not absolutely certain you’ve successfully identified a plant, do not consume it until you get confirmation from an expert.
Be aware that some edible plants have lethal look-alikes. For example, it takes practice to differentiate wild yarrow (a useful medicinal plant) with its deadly look-alike—poison hemlock.
Clouse recommends drawing sketches of the plants you’re learning to identify, as it can help with memorizing important visual characteristics. She also advises wildcrafters to learn the Latin names of plants since colloquial names may vary by region.
Keep in mind that certain parts of a plant may be safe for consumption and other parts may not. The seeds and flowers of a plant might be edible while the leaves and roots may be toxic, for instance.
As you’re learning to identify safe edible plants and fungi, be sure to consult multiple field guides and talk to experts who can confirm your identification. If you’re taking photos of a plant to get help with identification, be sure to capture the setting/surroundings of the plant and get close-up images of flowers, leaves, and the stem.
Even if a plant or fungi is consumable, note any contraindications with some medical conditions, interactions with certain pharmaceuticals, or restrictions for pregnant people when consuming wild food.
Even if a plant is safe to eat or use as medicine, consider whether it could be contaminated as you assess its immediate environment.
Clouse and other experts recommend not consuming plants that grew within 500 to 1000 feet to a roadway, especially high-traffic thoroughfares. Plants found along a remote country road may be safe.
Also consider the grade of the land in a foraging area. If the plants are downhill from a busy road, near a polluting mine or factory, or next to an agricultural area, avoid foraging there. Industrial fertilizers, animal waste, or other harmful pollutants may have washed onto those plants or into the soil
Harvesting seeds in these types of locations to grow at home is safe, but do not consume the plants.
Also note that an area may look safe, but if it’s been sprayed with pesticides or herbicides within the last three years, plants there may have absorbed poison. If an area has been spray-free for three years or longer, and there are no other contamination risks, it’s likely safe to consume found there.
Don’t be an unscrupulous forager.
Wherever you forage, be certain that you’re permitted to do it there. Get permission from landowners, and if you’re on public land, check local laws about foraging. Some parks, for example, allow foraging and some don’t.
Leave the smallest trace possible as you harvest wild food. Don’t leave big holes, messes or other signs of destruction.
Never harvest more than you’ll use.
Know the differences between native, non-native, and invasive species. If a species is native, protected, or rare, don’t harvest it. If it’s invasive and harmful to the surrounding environment, take all you want. This will stifle the spread of the harmful species and make more room for beneficial, native plants.
Consider how many other people may be foraging in that area. Be sure not to take more than a small fraction of the plant to leave some for other foragers. Clouse recommends not taking more than 10 percent of a plant in areas with lots of foragers.
In lower traffic areas, taking up to one-third of a plant may be okay. A common rule is to harvest one-third, leave one-third for the wildlife to eat, and one-third for the survival of the plant.
For more information on foraging/wildcrafting, herbalism, permaculture principles, homesteading, and more at facebook.com/restorationfarming

